

All cars have parts that wear out sooner or later. Some parts need to be replaced completely while some parts can get rebuilt and still be as good as they were the day the car left the factory. Brake calipers are one such part that is rarely talked about.
Our E46 M3 worked fine, but we noticed that the brake pedal was catching a little halfway down when pressed. It was a clear sign that we eventually had to do a brake caliper rebuild. We figured we would document the process and use it to show you how you can do this same job at home by yourself!
Article updated on 12/27/21. Original publishing date 11/01/16.

Is It Worth Rebuilding A Brake Caliper?
The answer is a strong — ‘it depends’. Although we’re all for a solid DIY project, sometimes you just need to get a new part.
Deciding to rebuild brake calipers is a popular choice for people who have rare performance cars where finding new OEM parts isn’t simple, nor is it cheap. Having new parts fitted is surely the best way to go, but sometimes, it’s just not possible.
There are kits available for a brake caliper rebuild, but they’re good for fixing minor wear. If there’s a crack on the calipers or the bore is deeply scored, a brake caliper rebuild kit won’t be of much help. If this is the case on your E46, you could use the opportunity to upgrade to M3 brake calipers.
Can I Rebuild My Own Brake Caliper?
You sure can, given that you have the right tools and parts. Most importantly, you need the know-how. It’s imperative that you know what you’re doing as the braking system directly affects the safety of the driver and passengers. It’s not something you want to experiment with.
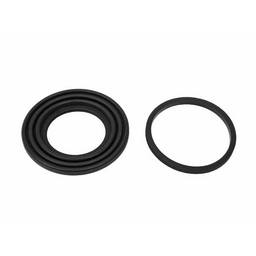
Whether you’re in the process of restoring a classic car, or you want to keep your performance car in mint condition, you can find brake caliper rebuild kits at the eEuroparts.com online store that will help you make your old calipers as good as new. In our particular case, we’ve used a Genuine BMW rebuild kit in the front, and another Genuine BMW kit in the rear.
How To Do The Brake Caliper Rebuild On A BMW E46
If you decide to go through with the brake caliper rebuild, we’ve put together an extensive DIY guide that will help. First, let’s go through the tools you’ll need to tackle this job.
The Tools Needed For A Brake Caliper Rebuild
The vast majority of brake calipers work the same way. You’re looking at minor differences in design. When it comes to doing a brake caliper rebuild on a BMW E46 M3, here’s a list of the tools you’ll need to get it done:
- 17 mm socket
- Breaker bar
- Torque wrench
- 7 mm Allen wrench
- 11 mm and 14 mm flare wrench
- ⅜ ratchet
- A small flat head screwdriver
- Brake fluid (In our case, BMW Genuine Dot 4)
- Anti-seize
- Penetrating oil
- Brake cleaner
- Towels
- Scotch-Brite pads
- Brake bleeder or someone to help you bleed the brakes
- Air compressor
- Jack and jack stands
- New rotors and pads
Step 1 – Get The Car On Jack Stands
Before starting any type of work, make sure your car is in gear and that you engage the parking brake. Using the 17 mm socket and breaker bar, break the bolts holding the wheels loose while the car is still on the ground.
Once you do this, get the car up on jack stands safely.
Step 2 – Remove The Wheels
After the car is safely put on jack stands, you’ll need to remove the wheels. To do this, you’ll need to remove all the bolts holding the wheels. Carefully remove the wheels from the car and set them aside or under the car for additional safety.
Step 3 – Lock The Master Cylinder (optional)

Locking the master cylinder will prevent the brake fluid from draining. This step is optional because you don’t need to replace the brake fluid if it’s already been replaced recently.
To lock the master cylinder, you’ll need to press the brake pedal and put something long enough to reach from the clutch pedal to the gas pedal, while holding the brake pedal down as seen in the picture above.

If you also need to replace brake fluid, you won’t need to lock the master cylinder. Either way, you’ll have to undo the nut on the brake line. Spray some penetrating oil on the nut first, and let it soak for a few minutes before trying to undo it.
Step 4 – Drain The Brake Fluid
You’ll need to go through this step only if you’ll be replacing the brake fluid during the brake caliper rebuild. To drain the brake fluid, you’ll need to undo the nut holding the brake line.
Before you do this, make sure you have a bucket, and towels to keep the mess as contained as possible. After draining all the brake fluid from the car, you can proceed to the next step.
Step 5 – Remove The Brake Line From The Caliper
The first thing you’ll need to do during this step is to remove the brake line from its retainer on the strut tube.
You’ll need to use a 14 mm flare wrench to remove the brake line from the caliper.
Step 6 – Remove The Caliper And Brake Pads
The first step of removing the caliper is removing the anti-rattle clip. After this, you’ll need to remove the two circular dust covers to make enough room to access the caliper pins.
To remove the caliper pins, you’ll need to use the 7 mm Allen wrench. After you undo the caliper pins, you’ll be able to remove the caliper altogether. When removing the caliper, make sure not to drop the brake pads if you plan on reusing them. If your pads are worn out, you might want to find a new set that best matches your intended application. Once the caliper is removed from the car, you’ll also need to remove the pads as well.
Step 7 – Remove The Piston From The Caliper

Removing the piston from the caliper during the brake caliper rebuild will require an air compressor, so you’ll be able to blow out the piston from the caliper. Before you start, make sure to put a towel or a piece of wood to stop the piston from shooting out of the caliper. This part can be dangerous, so make sure to be as safe as possible.

If putting pressure on the piston with an air compressor doesn’t work, you’ll need to reconnect the brake line to the caliper, bleed it, and push the brake pedal to actuate the piston. If this doesn’t work either, you’ll likely be looking at getting new brake calipers.
Step 8 – Inspect The Piston

Once the piston is out of the caliper, you’ll have access to the piston. Inspect the piston and proceed to rebuild it if the piston is in good enough condition. This includes removing the dust cover from the piston, cleaning it, using the flathead screwdriver to remove the seal from inside the caliper.
Once you remove these parts, use brake cleaner to clean the piston all the way around as well as you can. Then, use the Scotch-Brite pad to clean the piston more thoroughly and remove any stubborn debris.

If the piston isn’t in good condition after this, if it has dents or grooves, you’ll need to get another piston. Both the caliper and piston on the passenger side of the E46 we were working on were in pretty bad shape, so we replaced the whole thing.
Step 9 – Install The Piston Back To The Caliper

Before you start putting parts back together, you’ll need to lube the seal with brake fluid and install it into the caliper. Next, lube the inside of the caliper, the piston boot, and the piston with brake fluid as well.
With everything lubed, put the piston boot back over the piston. Make sure you start on the side closest to where the pads go. The picture above shows what it should look like. You’ll also need to pull the boot to the other end of the piston and make sure it’s fully extended.
Now that you’ve done this, you’ll need to place the piston and boot back inside the caliper. The top side of the piston won’t seat that easily, so you’ll need to work it slowly with a flathead screwdriver until it does. After this, make sure to push down the piston evenly.
You’ll need to push the piston in the caliper, so the boot will be seated in the piston groove. You’ll feel it pop in once it’s in the right place.
Step 10 – Install New Pads (optional)
Now that the calipers are ready, you can install new pads if you already decided to replace the old ones.
Step 11 – Reinstall The Calipers
Before reinstalling the calipers to the car, you’ll need to clean the caliper guide pins and lube them with anti-seize.
Reinstalling the calipers to the car is in the reverse order from the removal. Once you fit the calipers back to the car, make sure you bleed out the brakes with a power bleeder or by asking a friend to help you.
The guide pin torque needs to be 22 lbs-ft, and the wheel bolts torque needs to be 88 lbs-ft.
Get the Right Parts for Your BMW E46 Brake Caliper Rebuild!
We’ve described the brake caliper rebuild process for a BMW E46, but it’s pretty much the same for most other cars.
If you own a European car and want to rebuild your calipers, you’re at the right place! Here at eEuroparts.com, we carry all kinds of brake caliper rebuild kits. To find a kit that matches your vehicle, simply head over to our online store, input your car’s details, and you’ll be presented with a list of parts that perfectly match your vehicle!

