
Car maintenance is one of those things that has to be done. It’s not a matter of if but when you’ll have to change oil, filters, tires, and more. One of the most complex maintenance jobs that fall within this light maintenance category is the brakes.
Brake pads wear out over time. How fast this happens depends on a number of things, including your driving style, type of pads you run on your car, and more. Learning how to change brake pads on your own is the first real DIY job for most drivers. It’s not as hard as you’re about to find out! Arm yourself with patience as well as some tools and let’s get right to it.
Setting the Stage with Proper Tools and Accessories
Before we get to wrenching, let’s layout the tools you’ll need for the job divided into different stages. We’ll need to lift the car and secure it, get the wheel off, remove the caliper, replace the pads, and put everything back together. Here’s what you’ll need:
- Lifting the car – Car jack and a set of jack stands is the absolute best way to go. You can get both a heavy-duty jack and jack stands fairly cheap these days. Add here a few wheel chocks, and you’re good to go.
- Removing the Wheel – For this stage of the job, you’ll need a good socket wrench set. Additionally, you might want to throw in a breaker bar just in case some of those lug nuts don’t want to give up right away.
- Removing the Brake Caliper – Most brake caliper designs use two bolts to keep the caliper locked in around the pads. More often than not, you’ll need a regular socket wrench to remove these bolts, but there are instances where manufacturers used Torx bolts instead. This is a great moment to pat yourself on the back for getting that large tool kit not so long ago. Or to wish you had.
The rest of the steps in the brake pad replacement process use the same tools as listed above. Alright, let’s get started with step one.
Securing and Lifting the Car
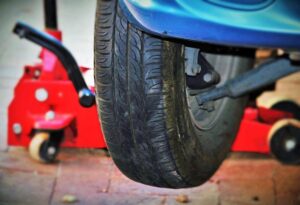
For the purpose of this guide, we’ll assume that we’re working on front brake pads. With your car parked on flat terrain, take the breaker bar and loosen the lug nuts on the wheel you’re working on first. It’s always easier to break the lug nuts loose when the full weight of the car is pressing on the wheel. With lug nuts loose, you’ll want to chock up the rear wheels to prevent the car from sliding back as you lift it.
Speaking of lifting the car, you can either do one side at a time using a small jack, or you can get a bigger jack lift the entire front end. We like the latter option as you’ll be replacing the pads on both sides anyway.
Jack the car up, take your jack stands and place them in the correct spots underneath your car. Make sure not to place them beneath the floorboard as that will quickly ruin your day. With jack stands in place, unload the jack and let the car sit on the stands.
Remove the Wheel
With the car safely in the air, remove the rest of the lug nuts and the wheel itself. We strongly suggest that you slide the wheel underneath the car just in case. You can never be too careful when working car jacks and jack stands.
Now that the wheel is finally off the car, you’re presented with the brake rotor and the brake caliper that sits right on top of it. Look at your caliper setup and find the bolts that keep the caliper clam fixed to the rest of the caliper.
Here’s a life pro tip to make things easier. Do yourself a favor and turn the steering wheel so that you have better access to the bolts.

Remove the Caliper
There are two schools of thought when it comes to removing the caliper – one prefers to remove the entire caliper while the other prefers removing just one bolt.
The idea with removing only one bolt is to pivot the caliper around the remaining bolt without pinching the brake line. In case you want to remove the entire caliper, make sure that you can set the caliper somewhere or zip tie it to a spring so that you prevent the brake line from getting kinked.
Even though opening the caliper only requires you to remove two bolts on average, this can be a tedious process. Never underestimate the effects of the environment on an exposed bolt. Things get seized up super quick from all the dirt and debris. Feel free to use penetrating oil, but make sure that you don’t apply any on the rotor. If nothing works, get that breaker bar you’ve used to “encourage” the lug nuts earlier and give those pesky caliper bolts the same pitch.
Replace the Pads
Once the caliper is off, you can remove the pads. These are often held in place by a clip, so feel free to work them a little. Pads usually come out with very little force. Replace the old with the new all while making sure that your pads are facing the right direction.
Replace the necessary hardware as well, such as the brake clips and backing plates. Next up, apply the anti-seize paste to the backing plates if necessary and put everything back together. A quick note when putting any kind of bolts back. Make sure that you’re using the right torque specs. Over torquing, bolts can cause all kinds of trouble you definitely don’t want to deal with. Check your owner’s manual for more information.

Which Pads to Get? – OEM or Premium Aftermarket?
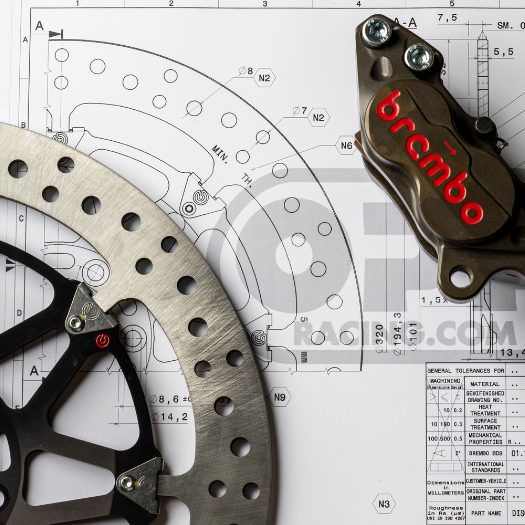
There are plenty of brake systems manufacturers out there, but Brembo is definitely one of the best you can turn to. Brembo’s NAO, Low-Met, and standard ceramic pads offer improved braking, better heat handling, and lower brake pad wear. In most cases, you’ll find that Brembo’s pads are better than OE and definitely up there with the rest of tier one brakes manufacturers.
If you’d like to find out whether Brembo makes pads for your specific vehicle, hop on over to our store and input the basic information required by our navigation tool. Once you fill out all the info, our system will give you the complete list of compatible Brembo products for your car.

Finishing Touches
With new pads installed, brake caliper back in place, and wheel mounted on the hub, and it’s time to lower the car down. There are only a few things left for you to do right now. Start by checking the brake fluid levels. As pads wear out, the fluid levels tend to drop since the piston has to extend more to achieve braking. Make sure to top off the fluid if necessary once you’ve replaced your pads.
Lastly, go out for a ride and try out your new brakes. At this point, you can be proud of your work and hopefully start eyeing the next DIY project. Before you know it, you’ll be wrenching on your car on the regular!

