
When you go out to get groceries, and you’re navigating a packed parking lot, what’s the one thing you’re thinking about? Trying not to hit someone, or being hit yourself. We mainly look for other cars and distracted drivers, but what about obstacles that can damage the underside of our vehicles? Looking at it from a mechanic’s perspective, hitting the car from underneath can cause the most damage because that’s where the delicate part of your engine is located – the oil pan.
Cars from the VAG group, especially performance Volkswagens and Audis have the issue of the oil pan hanging too low. For some of these cars, regular speed bumps and potholes can be a problem, but there’s a solution. Raising the pan for even as little as 2 inches can significantly reduce the chance of serious damage should you run over a boulder, or something else while driving.
Article updated on 12/13/21. Original publishing date 05/19/16.
Why Raise The Oil Pan?
The oil pan is a purely mechanical part. Denting it doesn’t necessarily mean you need to replace it. However, a dent can block the oil pump pickup, which can lead to oil starvation, and ultimately engine failure. Cracking it, on the other hand, means you’ll lose all the oil from your engine which we all know is bad news.
To answer the question of why we’ve decided to raise the oil pan on our track Audi 3.2L, it’s because we found it easier and more affordable to raise the pan than to have a catastrophic oil leak that will destroy the entire engine. Simple math. Also, depending on the model year of your 3.2L, your engine might feature an oil dipstick delete, which makes monitoring your oil a real pain. There are ways around this issue, fortunately.
Is Raising the Oil Pan Worth It for Regular Commuter Cars?
Even some regular cars have low-hanging oil pans, especially Audi and Volkswagen models with the 3.2L VR6 engine. We already mentioned that even speed bumps and potholes can cause damage to the oil pan if you go over them the wrong way, so being on the safe side is definitely worth it.
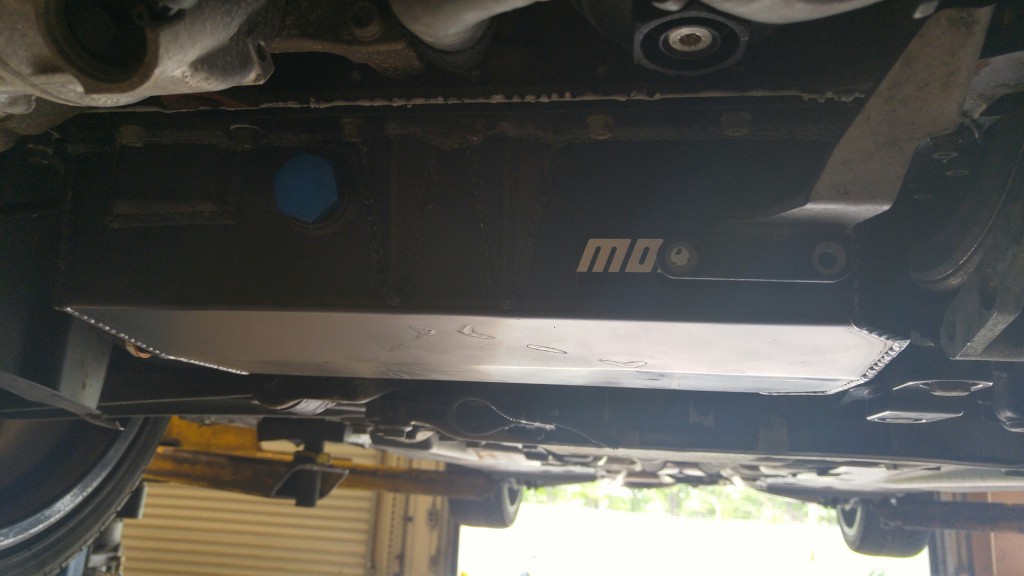
When it comes to our Audi 3.2L VR6, there is a factory-built oil pan and an appropriate oil pump that allowed us to raise the clearance by 2 inches. Here’s how we did it.
How To Raise Your Pan
The raised oil pan for our Audi 3.2L is a BEAST made from steel, and it has baffled doors, extra oil return bungs, and an oil drain plug that has been moved, but even if there’s no OEM part for your car, the process of fitting a raised pan is the same. Just keep in mind that vehicles with a 24V VR6 or an MK4 R32 will need the shorter oil pump.
Step 1 – Drain The Oil
The first step is to completely drain the oil from your engine. If you already changed the oil recently, you should probably time this job with your next oil change, so you won’t need to spend money buying oil and filters all over again.
One extra tip we’ll share with you is to lock the serpentine belt tensioner into place and make sure the belt has some slack. This will make much more sense in one of the later steps.
Step 2 – Remove The Bolts Holding The Oil Pan To The Transmission Housing
To remove the bolts holding the oil pan to the transmission housing, you’ll need a 16 mm socket. Simply turn the bolts counterclockwise and make sure you don’t lose these bolts.
Step 3 – Remove The Bolts Holding The Pan To The Engine Block
For this step, you’ll need a 5 mm Allen wrench. You’ll find a number of Allen head bolts holding to the engine block, and you’ll need to remove all of them. There are also a couple of bolts hidden between the engine and transmission and to remove them, you’ll need a 5-inch-long extended Allen tool.
During this step, you’ll also need to remove the bolts that secure the SAI pump to the engine. Two bolts are located in the oil pan while one is in the block.
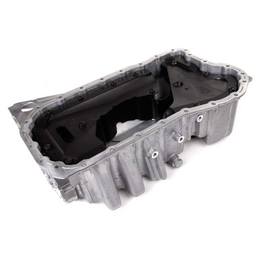
Step 4 – Remove The Oil Pan

Remember what we said about locking the serpentine belt tensioner into place? Because the stock pan doesn’t have much clearance, you’ll need to remove the belt from the idle pulley on the bottom, and by locking the tensioner, you can do this without too much hassle.

Once the oil pan is removed, you’ll need to remove the old sealant. This can be done with a single-edge razor and sandpaper. Make sure to remove all the residue that may have got caught in between.
Step 5 – Replace The Oil Pump
This step is for those vehicles that require a shorter oil pump to fit properly with the higher-sitting oil pan. If your stock oil pump fits, you can skip this step.
The oil capacity will stay the same because the higher-sitting oil pan is designed to make up the capacity it lost in height in different places.
Step 6 – Place Sealant On The New Pan
When it comes to applying the sealant to the new pan, it’s recommended to use VAG recommended sealant. Make sure to have everything ready because you’ll have only 5 minutes to fit the new oil pan back before the sealant starts hardening.
You don’t need to use plenty of sealant to prevent a leak. You just have to apply it in one continuous motion, and you’ll be fine. Applying more sealant than needed can cause the excess sealant to enter the engine and cause issues such as clogging the oil pickup strainer or worse.
Step 7 – Fit The New Oil Pan By Lightly Tightening The Bolts

After applying the sealant, place the new oil pan in position and tighten the bolts with your fingers, so the pan is snug to the sealing surface.
Next, continue tightening the bolts that connect the oil pan to the transmission to 33 ft-lbs. After tightening these bolts, continue tightening the oil pan to block bolts to 11 ft-lbs going in a diagonal pattern. You should start with the middle bolt, and work your way around the pan.
Step 8 – Install The Drain Plug
Once you’ve secured the new oil pan, you can continue by fitting the new drain plug as well by tightening it to 15 ft-lbs. After doing this, you’ll need to wait for about 30-45 minutes to let the sealant do its job. At this point, you also shouldn’t add oil to the car until the sealant is properly cured, which is the next step.
Step 9 – Add Oil To The Engine
After waiting for the sealant to cure, you can continue by adding the proper amount of engine oil to your car. We recommend using fully synthetic Motul engine oil, made in France. You can also replace the oil and other filters as well.
If you installed a new oil pump as well, crank the engine over by hand a couple of times, so the pump will be primed. Before starting the car, visually inspect the new oil pan for eventual leaks.
Step 10 – Check For Leaks
If everything went smoothly, make sure that your serpentine belt tensioner is UNLOCKED before starting your engine. Leave the car running for a few minutes and check for leaks. The double check is necessary since a working motor introduces oil pressure to the equation.
The Hunt For Parts
If you thought it would be difficult to find the required parts for this conversion, there’s nothing to worry about. We at eEuroparts.com hold a variety of parts that can be fitted to most European cars.
You’ll be able to find all the parts you need to raise your low oil pan, from aftermarket pans and shorter oil pumps, to sealants that are necessary to put everything back together.
Feel free to post your oil pan nightmares on here and be sure to check out what we have going on at No Limits Racing.


Why was it necessary to lock the serpentine belt tensioner in place, and WHY didn’t your procedure remind the weekend mechanic to make sure it is unlocked and providing tension before starting the engine?????
With the clearances of the stock pan, you have to remove the belt from the idle pulley down bottom in order to remove the pan without damaging anything. As far as forgetting to put a reminder to release the tensioner from the service position, I simply forgot to add that. I appreciate it and will try to remember any small details like that in the future. Always improving!