
Volvos are built tough. Yet, even the best of the best will require some TLC from time to time. Today we’ll talk about replacing Volvo XC90 rear shock absorbers. The particular model we’re talking about here is an early 2000s version of this highly popular SUV that is fitted with standard shocks. The procedure is different for models that feature Volvo’s NIVOMAT suspension.
Article updated 08/19/21. Original publishing date 08/09/17

Diagnosing Volvo XC90 Rear Shock Issues
Shock absorbers can fail gradually or momentarily. Either way, your rear shocks will give you some obvious signs when they’ve decided to call it quits.
Shocks usually wear out at the same time. Unless you are replacing your shock as a result of an accident, you should replace them in pairs. Changing all four corners at the same time keeps the current balance of your vehicle at the highest level. Otherwise, there will be an imbalance between the new shock absorbers and the old ones.
If you think that the ride quality and performance of your vehicle is not what it used to be, knowing how to diagnose your shocks will be very useful for you. As it turns out it’s very easy.
Here are some methods to determine if your rear shock absorbers are failing:
Check Your Car From the Back
When you park on a flat surface, there should be no right, left, forward, or backward leaning. A standard XC90 has 9.1 inches of ground clearance, you can measure the height. If your vehicle’s distance between the top of the wheel and the fender looks like it’s below the minimum value, there may be a problem with your vehicle’s shocks.
Apply Pressure to the Trunk
Get to the back of your vehicle and put your knees on the bumper and your hands on the trunk floor, use your weight to make the vehicle flex. Do this a few times to allow the vehicle to flex well and inspect it visually. Is your vehicle providing balanced suspension or is it showing uncontrollable bouncing? If it jumps out of control, there may be wear or malfunction in the shocks.
Inspect the Shocks and Connecting Components
You can examine the shocks visually. You should especially check if there is liquid leaking in the shock absorber tubes.
Discomfort While Driving
This is a diagnostic method you use while driving your vehicle. If your vehicle springs more than normal amounts when passing a pothole or a bump, there is a problem with your shocks.
Which Rear Shocks to Get?
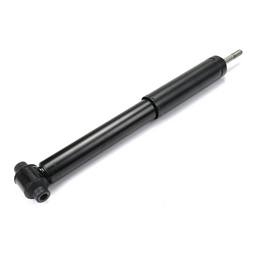
Rear shocks preference may be different for each user. While some prefer soft shocks, some may prefer harder ones. Soft ones will give you a more comfortable ride, harder ones will be more ideal for handling and sporty driving.
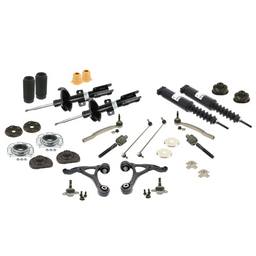
As a manufacturer, Volvo offers genuine shocks as seen above, but there are also aftermarket brands that will work great on your XC90. Bilstein and Sachs are the quality options for XC90 rear shock absorbers depending on your needs as a driver.
Replacing XC90 Rear Shock Absorbers – Step-by-Step Guide
If you need to change the shocks of your car, and you want to do it yourself without spending too much money, you’re in the right place! What follows is a step-by-step guide on how to get this job done in your driveway. But, keep in mind that shock replacement is not an easy task.
Volvo shocks require a special tool to replace, which we offer. If you do not want to incur the cost of special equipment, you can still use regular tools, but it will be challenging. You will also need a razor to cut through the trunk insulation if it is the first shock replacement for your Volvo.
Step 1 – Jack Your Car
Park your vehicle on level ground. Loosen the lug nuts on your tire. Lift your vehicle with the help of a jack and put a jack stand under it, this is a safety precaution and is indispensable. Remove the vehicle’s tires and access the shocks. The upper mounts of the rear shocks are in the luggage compartment. You need to find and explore these connection places in advance.
Step 2 – Locate & Access the Upper Bolt

On your Volvo XC90, the rear shocks’ upper bolts are located under the boot cover fabric. You will need to lift the fabric and lining to access these seams. You will have to cut the lining with a razor if it is the first time you are replacing your Volvo’s shocks. Don’t worry, Volvo made it easy for you. Stove away your 3rd-row seats if you have them, and you will see a faint depression in your trunk.
After you cut through the insulation, locate the oval cover under it and peel it off. There is one last cover you should twist off, and you should have your rear shock’s upper mount within your reach.
Step 3 – Clean & Spray the Bolt with Penetrating Oil

The most difficult part of shock removal is taking off the mounting bolts and nuts. These connection points will be stubborn to disassemble, especially if your car has some mileage on it. We strongly suggest using penetrating oil and a wire brush to clean up the bolts and nuts before you attempt to remove them. When you are done, spray some more oil and give it about 5 minutes for it to work its magic.
Step 4 – Remove the Shock From the Suspension
Your rear shocks are attached to the suspension through the lower control arm. You can use a ratchet or wrench to unscrew the nut that attaches the shocks to the suspension. A floor jack may come in handy here to release the tension from the spring. It should slide out easily from its seating after you unbolt it.
Step 5 – Remove the Upper Bolt

One of the common problems you will probably face is when you try to loosen the suspension shaft nut, you will find that it turns with the bolt. You need to turn the nut while you keep the stud steady.
This is where that special Volvo tool comes in handy. If you don’t have it, you can also use an 18 mm open-ended wrench to keep the nut steady and a T40 Torx with an extension for the stud. Your shocks should drop down to the floor when you unbolt the top but if it doesn’t, you can give a light tap on the top.
Step 6 – Put the New Shocks Back on the Suspension Link
You may need to apply some pressure to shorten the damper. Place the shock in its seating, it should stay on without bolting. Line the shock’s upper mount correctly before you bolt the lower side to the lower control arm.
Step 7 – Install the Upper Bolt
Connect the upper bolt of the shock in the trunk. Use the special tool or the technique you used when you were unscrewing. Take care when tightening these screws and tighten them using appropriate force.
Step 8 – Mount the Wheel
After all the connections and parts are assembled, attach the wheels to the axle and tighten the nuts. Then lift the jack and pull the safety jack stand from under the vehicle and lower the vehicle. After you do so, tighten the wheel nuts completely and finish the process.
Where to Find Rear Shocks for Volvo XC90
As mentioned before, you will have a wide selection when you are shopping for rear shocks. Just decide what kind of ride you would prefer for your Volvo XC90 and choose your car’s model from the drop-down menu at our online store. We will give you a list with all the parts compatible with your vehicle, and you can easily select the shocks you want.


well I completely destroyed the top nut. Tried to cut it out but couldn’t get the dermal in the well. The only thing holding this is the rubber bushing right? If I get a whole saw slightly bigger than the nut and cut through the bushing won’t the shock fall out? I have the bottom bolt out.
Can you cut the shaft out from the bottom?
I just did this job over the weekend, so I’ll throw in my 2 cents. I sprayed the bolts a few days prior to doing the job with PB blaster, stunk up the car. Bought a few of the fancy tools to try to get the bolts off, no luck, the star bit stripped. I should have done this from the beginning and saved an hour of trying to get the bolt off, solution….Drill the off. Run a bit down the middle of the shaft and in 3 minutes it will break off.